 Use the tree control to drill down
to the folder containing the symbol on which your Plan View symbol
will be based. The folders listed here are the same as those
displayed by the Symbol Browser in
all drawings.
Use the tree control to drill down
to the folder containing the symbol on which your Plan View symbol
will be based. The folders listed here are the same as those
displayed by the Symbol Browser in
all drawings.
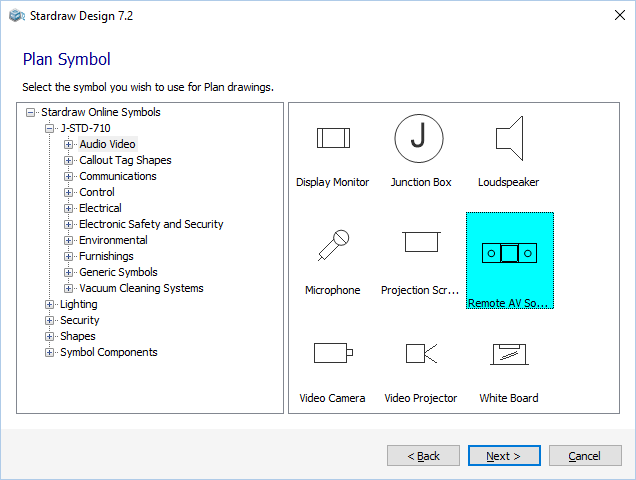
The righthand pane shows thumbnail previews of the symbols in the
selected folder. Click on a thumbnail to select it as the symbol
for your UDP - it will be highlighted as shown.
When you've chosen the base symbol click on Next>.
This creates a basic Plan View symbol for your UDP.
If you wish later to edit or add more sophisticated graphical elements
to your UDP symbol you can use Symbol
Edit mode.
 When you have completed the Plan
View Symbol Wizard you will return to the symbols page of the UDP
Wizard.
When you have completed the Plan
View Symbol Wizard you will return to the symbols page of the UDP
Wizard.
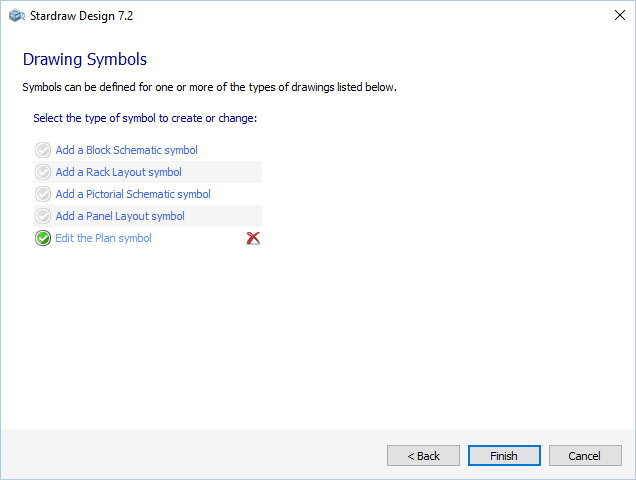
The  indicates that a Plan View Symbol has been
created for the UDP.
indicates that a Plan View Symbol has been
created for the UDP.
If you wish to change the symbol, click on Edit
the Plan View symbol. This restarts the Plan View Symbol
Wizard and populates it with the data you have already defined for
this symbol. You can use this technique to change the symbol
at any time by rightclicking on the UDP in the Product Browser and
selecting Edit Product to
start the UDP Wizard.
To delete the Plan View symbol, click on the  .
.
Click on any of the links to add a new symbol for the UDP, or click
on Finish to close the
UDP Wizard.