 The Cable Label tool is available in Block Schematic
drawings: use it to set Cable Labels quickly and easily, just by clicking
on Cables.
 The Cable Label tool is available in Block Schematic
drawings: use it to set Cable Labels quickly and easily, just by clicking
on Cables.
When you click on the Cable Label tool you go into Cable Labelling mode and the Cable Labels dialog will be displayed.
 Use the New
Values fields to set the label values you want; you can use
the Cable Label tool to set one, any or all labels in any Cable.
Increment: if your label value is a number you can use the Increment fields to create sequentially numbered cable labels. Check the increment box to make the labels auto-increment, and use the edit box to specify the 'step' value i.e. how much is added to each subsequent cable label.
When you have set your values simply click on the Cables in your drawing to apply the Cable Labels. Each cable will be highlighted in green when the cursor is over the cable; click to apply label values.
While the Cable Labels dialog is displayed you are in Cable Labelling mode. To exit this mode press Escape on your keyboard to return to the Selection cursor mode, or click on a cursor or tool button.
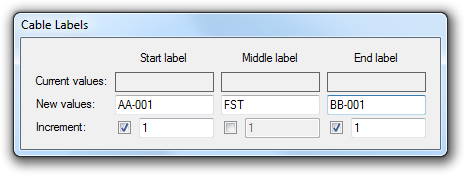
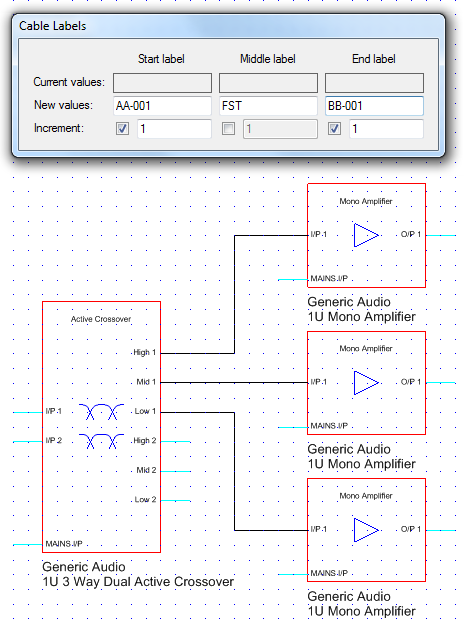
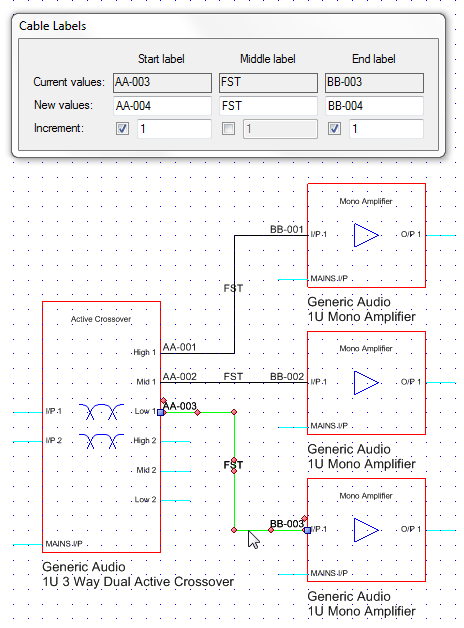
The images below show how you can set values and use Increment to produce sequentially numbered Cable Labels. Figure 1 shows an example of initial values; note that the Increment fields are set for the Start and End Labels. Figure 2 is the result of clicking on the 3 cables in the drawing; note that the start and end labels are sequentially numbered.
 |
 |
Figure 1 - Setting Cable Label Values |
Figure 2 - Applying Cable Labels |
The display properties of Cable Labels (font, height, color etc) are set using the Properties Grid for the Cable object.
Cable Labels can be moved using the red handles displayed at the label's origin (left side for start labels, right side for end labels, midpoint for middle labels).
The movie below shows how to use the Cable Label tool to set Start, Middle and End labels, with or without sequential numbering, and also covers generation of a Cable Schedule from a Block Schematic drawing.