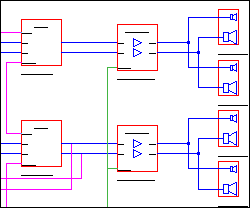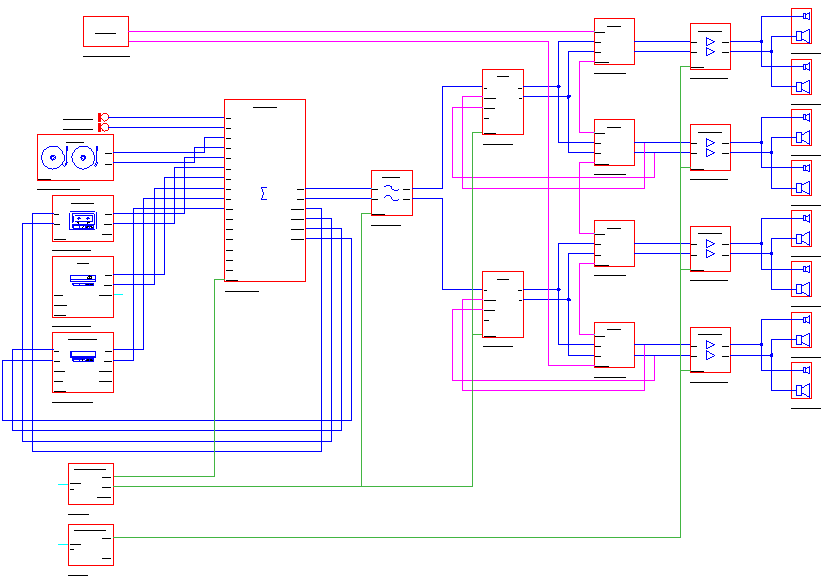
The Block Schematic template is designed to make it easy to draw single-line system drawings. The symbols provided for this template are not drawn to scale, rather they are standard symbolic representations of equipment which can be used to create a neat and accurate system design. Its use is intended as an engineering tool and an example of the kind of drawing usually produced in this environment might look like this:
Rather than using the Line tool, which draws single, unconnected lines, to represent the circuit paths between equipment, use the Dogleg or Cable tools which are specifically designed for this environment and create a single object made up of multiple lines. By virtue of Rubber-Banding, Cables and Doglegs stay connected to symbols as you move them.
Use the Edit Node cursor to reshape Cables and Doglegs.
Put different circuit paths on the designated layers (e.g. Audio Circuit Paths, Video Circuit Paths etc) so that you can view discreet circuit paths in isolation using the Tools | View sub-menu.
With any schematic, but especially so with intricate designs, it is good practice to maintain equal spacing between circuit paths and similar spacing between discrete products. It is also advisable to adopt a consistent approach to colours and layers. A neater, cleaner layout is easier to read than a haphazard one, and the symbols provided for this environment are drawn to maintain certain qualitative standards.
|
|
|
|
Good Technique |
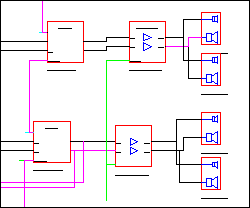
Poor Technique |
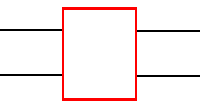
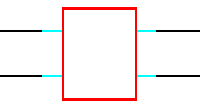
When drawing connections between equipment always have the Snap to Grid and Snap to Connector modifiers on and use the turquoise connection stubs on symbols as guides. The grid will ensure that your connections go to the right point, but you should draw them so that they reach the outline of the product rather than the end of the connection stub. This makes for a much cleaner design, particularly when printing in colour, and ensures that Rubber-Banding will work.
|
|
|
|
Right |
Wrong |