Layers contain a group of controls that can overlay other controls on a report. The controls are editable only on the currently selected layer. You can toggle between the layers and create a design in each layer. You can lock or unlock, add or remove, and show or hide these layers. When you create a new report, a default layer is automatically added to it.
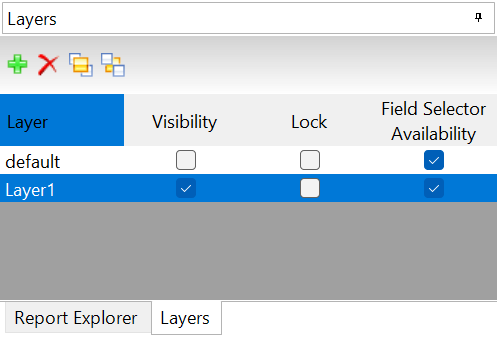
The Layers Editor can be accessed from the Toolbox on the right of the screen. Its default location is the tab behind the Report Explorer. The following table lists the actions you can perform through the Layers Editor.
| Layers Element | Description |
|---|---|
 New |
Adds a layer to the layer collection. |
 Remove |
Removes the selected layer from the layer collection. |
 Bring to Front |
Brings the group of controls placed on a selected Layer to the front of the controls on other layers. |
 Send to Back |
Brings the group of controls placed on a selected Layer to the back of the controls on other layers. |
| Visibility | Toggles the visibility of the selected layer at design time. This lets you see what controls are on each layer. |
| Lock | Toggles locking and unlocking of the layers. Locking a layer locks all of the controls on it to prevent accidental changes. |
| Field Selector Availability | Controls the visibility of the data field icons for the entire report or certain controls placed in a specific layer.
Note: This property is only available to certain controls, namely: TextBox, CheckBox, InputField, Image, Table, and Tablix.
|
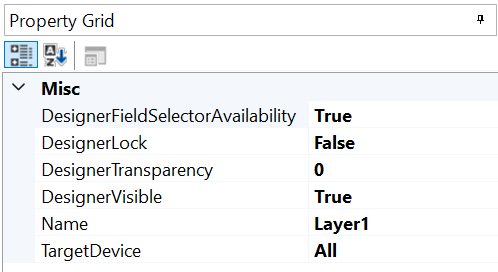
Selecting any Layer from the Layers editor reveals the following properties in the Properties panel.
| Property | Value | Description |
|---|---|---|
| DesignerFieldSelectorAvailability | True/False | Control the visibility of the data field icons for the entire report or certain controls placed in a specific layer. This property can also be set using the checkbox for Field Selector Availability in the Layers Editor. |
| DesignerLock | True/False | Locks or unlocks controls placed on a Layer. You cannot move or resize the controls placed on the design surface of a locked Layer through a keyboard or a mouse. Other editing functions like cut, copy, or paste and addition or deletion of controls are possible. This property can also be set using the checkbox for Lock in the Layers Editor. |
| DesignerTransparency | 0 to 1 | Sets the transparency of the controls on a Layer at design time to a value between 0 and 1. A Layer with transparency set to 1 is not visible on the designer. |
| DesignerVisible | True/False | Determines if the controls placed on a Layer are visible on the designer or not. This property can also be set using the checkbox for Visibility in the Layers Editor. |
| Name | Layer Name (string) | Sets the name of a Layer (except the Default Layer). |
| TargetDevice | None, Screen, Paper, Export, All | Specifies or limits the visibility of controls placed on a Layer based on the selected target. See View, Export, or Print Layers for information on TargetDevice-specific outputs. |
The TargetDevice property determines whether you can view or print the controls placed on a Layer. This property allows you to show or hide the controls that belong to a Layer on a specific target device. For example, if you want to display controls placed on Layer1 in the Viewer and print the output to PDF, you can select both the Screen and Paper options but, if you want a layer to be visible in print only, check only the Paper option.
Use the following steps to set or change the TargetDevice property of a Layer:
For further information on Layers refer to the general ActiveReports .NET documentation for Page/RDLX reports.