 .
.|
How Do I ... ? |
Use the Panels Control |
|
|
The Panels control allow you to easily break up your User Interface into functional pieces, whilst maximizing available screen area.
There is a multimedia walk-through of these techniques in the online
Technical
Resources.
Using the Panels control is very straightforward:
add a Panels control to your form, it contains a single Panel by default,
create your first group of controls on the first Panel,
add another Panel to the Panels' collection,
create your next group of controls on the new Panel,
repeat as necessary,
add other buttons to your form to select which Panel is visible.
Tip
Refer to the Panels Control section for an introduction.
In the Forms View, first resize the form so that is around twice its default size, around 600x600 pixels.
From the Controls tab of the Toolbox click and drag a Panels control onto the form.
Move the Panels control to the center of the form.
In the Property Grid the Panels control's Name is panels1 and the CurrentPanel property is panel1.
From the Controls tab click and drag a DigitalLED control onto the current Panel.
To ensure you place the digital LED onto the Panel and not onto the Form, as you drag the digital LED control over the Panel control, its border becomes active; when you drop the control it will be added to the Panel.
To verify this, click the border of the panels1 control and move it: the digital LED should move with it.
Whilst we have now achieved creating a Panels control and adding a digital LED to the default Panel, it is currently no different to having placed it directly onto the Form. To properly illustrate the usefulness of the Panels control we need to add a second Panel.
Select the panels1
control. In
the Property Grid is the PanelsList
collection property:
Click the ... button to open
the Panel Collection Editor
dialog.
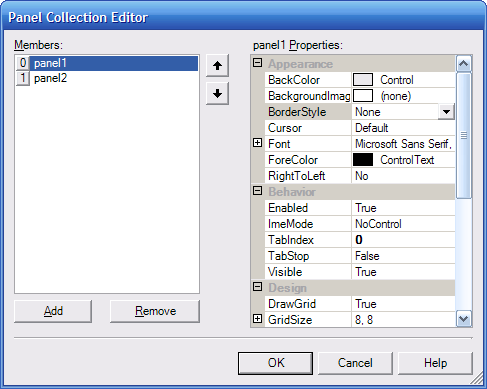
The Panel Collection Editor dialog
In the collection editor
is a single item panel1 and it
displays the many properties you can modify for a Panel.
Click Add to create a second
Panel and click OK to close the collection editor.
With the panels1
control selected, click the CurrentPanel
property and select panel2.
The Panels control becomes blank, as the new Panel, panel2,
is currently empty.
From the Controls tab click and drag a LevelSlider control onto the current Panel.
Double-click the level slider control to display the Actions Editor for the levelSlider1.ValueChanged event.
Add the following Action
to set the digital LED's Text
property:
Controls –
Form1 –
panels1 –
panel1 –
digitalLED1 –
Set Text to
Set the Text
property to:
Controls –
panels1 –
panel1 –
levelSlider1 –
Value
Select the panels1 control. In the Property Grid the CurrentPanel property is panel2 which is the currently visible Panel.
Click the CurrentPanel
property; a drop-down list of all Panels is displayed.
Select the Panel you wish to view: it will become the visible Panel.
The form now has two Panels, each of which contains a control therein. However only the currently selected Panel, i.e. panel2 will be shown unless a method is available for the user to select which Panel is visible.
From the Windows tab click and drag a Button control onto the form.
Change the button's Text property to "Panel 1".
Double-click the button control to display the Actions Editor.
Add the following Action
to make panel1 the visible Panel:
Controls –
Form1 –
panels1 –
Panels –
Set CurrentPanel to
Set the CurrentPanel
property to:
Variables –
Enter Value: panel1
Close the Actions Editor, and click and drag a second Button control onto the form.
Change the second Button's Text property to "Panel 2".
Double-click the button control to display the Actions Editor.
Add the following Action
to make panel2 the visible Panel:
Controls –
Form1 –
panels1 –
Panels –
Set CurrentPanel to
Set the CurrentPanel
property to:
Variables –
Enter Value: panel2
Click Ok to close the Actions dialog.
Run the project: The panel with the level slider will be visible: move the slider to the midpoint. Click the Panel 1 button: the level slider will be replaced with the digital LED, which will display the magnitude of the level you set. You can switch between each panel using the two buttons.